- A+
Introduction
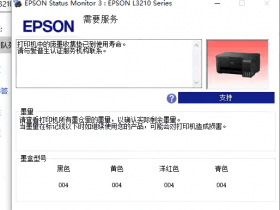
The Epson L1300 printer is a reliable and cost-effective ink tank printer that offers efficient printing services to meet the needs of a variety of users. However, over time, the printer may accumulate error codes and messages, which can cause printing issues. In such situations, users may need to reset the printer to default settings, which will help to clear any error codes, messages and ensure the printer is back to its normal working condition. In this article, we will explore how to clear the Epson L1300 printer error codes by resetting it to its default settings.
Step 1: Turn off the Printer
The first step in resetting the Epson L1300 printer is to turn it off. This process is straightforward; all you need to do is to press the power button once, and the printer will turn off. Ensure that the power cable is still attached to the printer and a power source to prevent any unexpected power interruption during the resetting process.
Step 2: Press and Hold the Resume Button
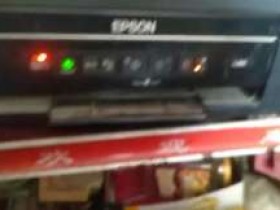
The second step in resetting the Epson L1300 printer is to press and hold the Resume Button. This button can be found on the printer's control panel, which is usually located on the front part of the printer. Press and hold the button for 10-15 seconds, and then release it. Be sure to hold down the resume button for the right amount of time, or this step may not work correctly.
Step 3: Press and hold the Power Button
After releasing the Resume Button, press and hold the Power Button while still holding down the Resume Button. This process is necessary to reset the printer's default settings, which will wipe out any error messages codes. Hold down both the resume button and power button simultaneously for about 10-15 seconds. Release the buttons once the printer turns on, and the LED light stops flashing.
Step 4: Wait for the Printer to Reset
After releasing both buttons, wait for the printer to reset to its default settings. The duration of this process may vary, depending on the number of error codes and messages on your printer. At this stage, the printer will produce some noise, and the two LED lights on the printer may flash. Once the printer is done with the reset process, it will stop producing any noise, and the LED light will stop flashing.
Step 5: Test the Printer
After the reset process, it is crucial to test the Epson L1300 printer to ensure that it is working correctly and back to its normal condition. To do this, turn on the printer and print a test page. If the printer works well, then it shows that the reset process has been successful.
Conclusion
Resetting the Epson L1300 printer is a simple process that can help to clear any error codes or messages that can affect the printer's performance. By following these steps, users can easily reset their printers to their default settings and begin printing immediately. Resetting the printer to its default settings is also an affordable way to maintain and prolong the printer's life, reducing the need for frequent repairs or replacements. So, if you encounter any error codes on your Epson L1300 printer, always remember to reset it to its default settings.
- 在线微信客服
- 加13296588055 故障咨询
-

- 远程QQ客服
- 加QQ6268980 远程服务
-